
Opening a second branch
Branches → Employees → Groups → The location switcher → Reports
Your academy opens a second branch. This flow sets it up and shows how the rest of Tuevia changes once you work in more than one place. Adding a branch and its rooms needs somebody who works in all of the academy’s locations, such as the owner.
1. Branches: the branch and its rooms
Section titled “1. Branches: the branch and its rooms”In Administration → Branches, press Create Branch and give it a name. A new branch starts active and with no rooms: open it and press Create First Room, then Add Room for the others. The rooms are what you choose when you open groups at stop 3.
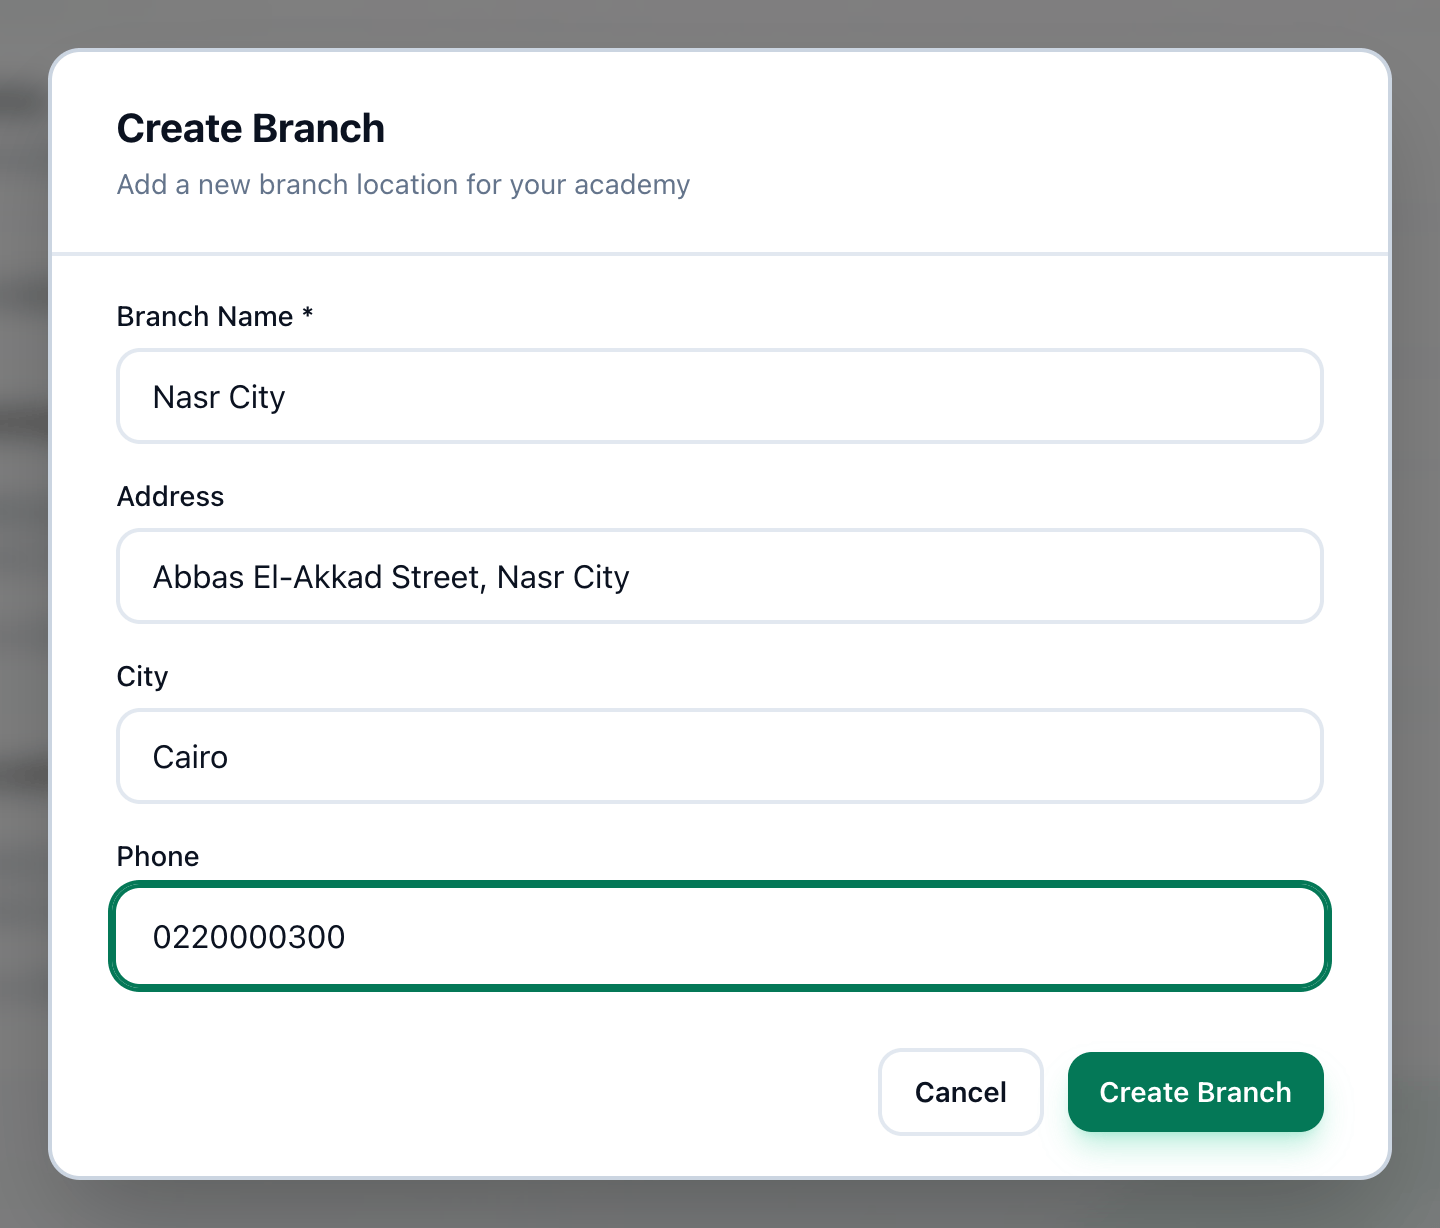
- Branch Name
- Create Branch
See Adding a branch and Rooms.
2. Employees: who works there
Section titled “2. Employees: who works there”Everyone who works in All branches works in the new branch already. For anyone on Selected branches, open their profile on People → Employees, press Edit and tick the new branch. People see a branch’s data only if they work there.
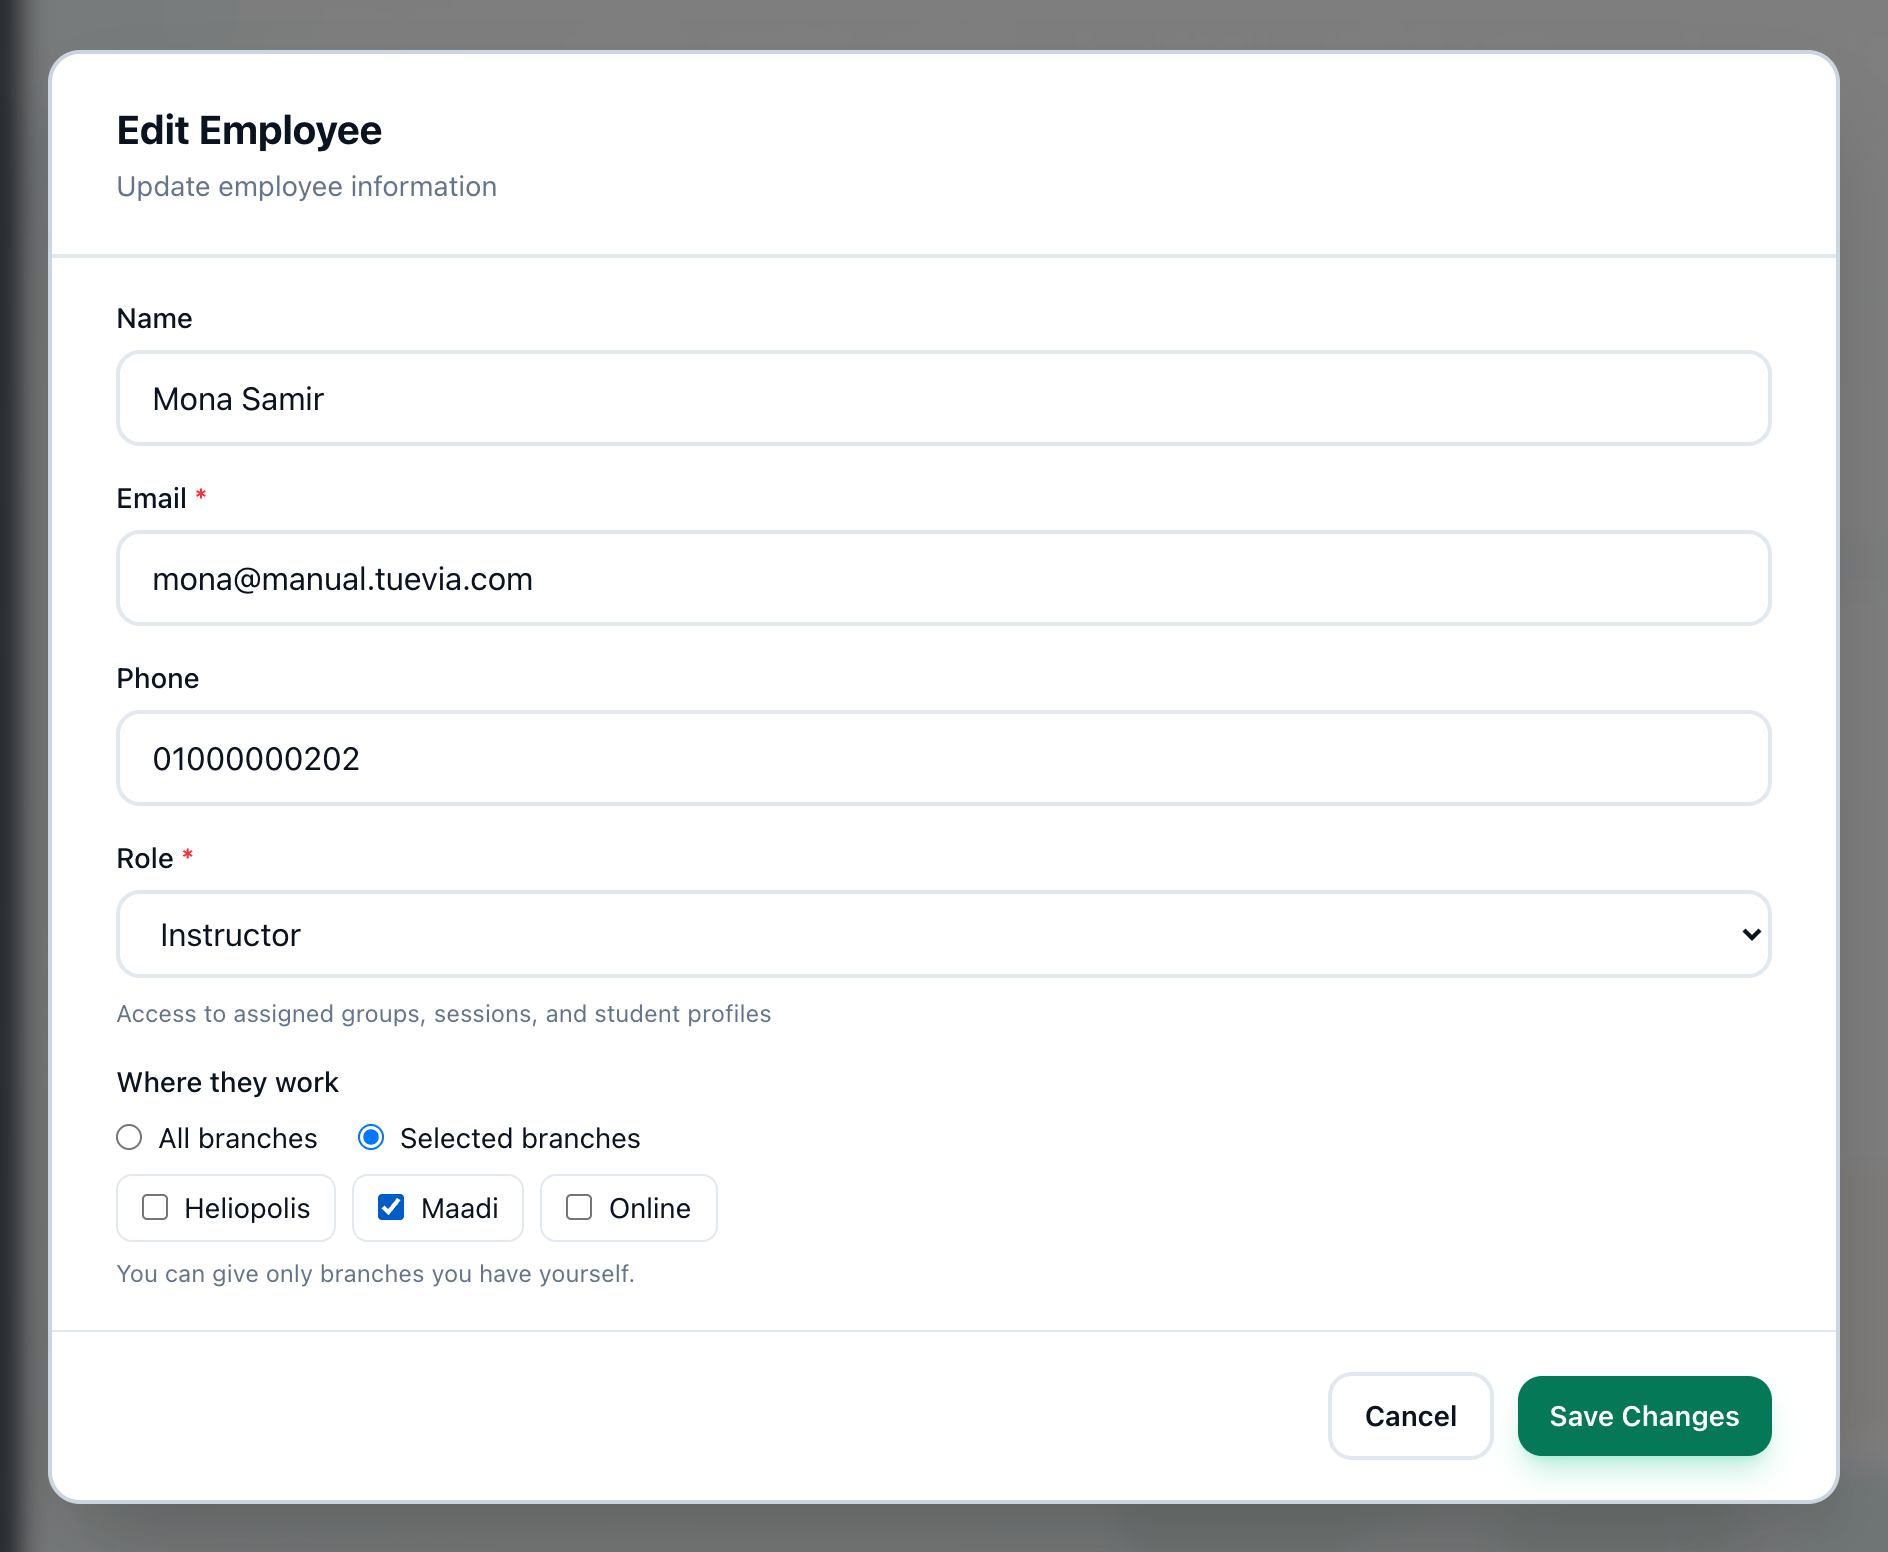
- All branches
- Selected branches
- The branches
- Save Changes
For staff hired for the new branch, invite them with only that branch ticked - see Hiring an instructor. See Where somebody works.
3. Groups: open groups there
Section titled “3. Groups: open groups there”On Teaching → Groups, create a group and choose one of the new branch’s rooms in Room. The group belongs to its room’s branch, and so do the fee agreements tied to it.
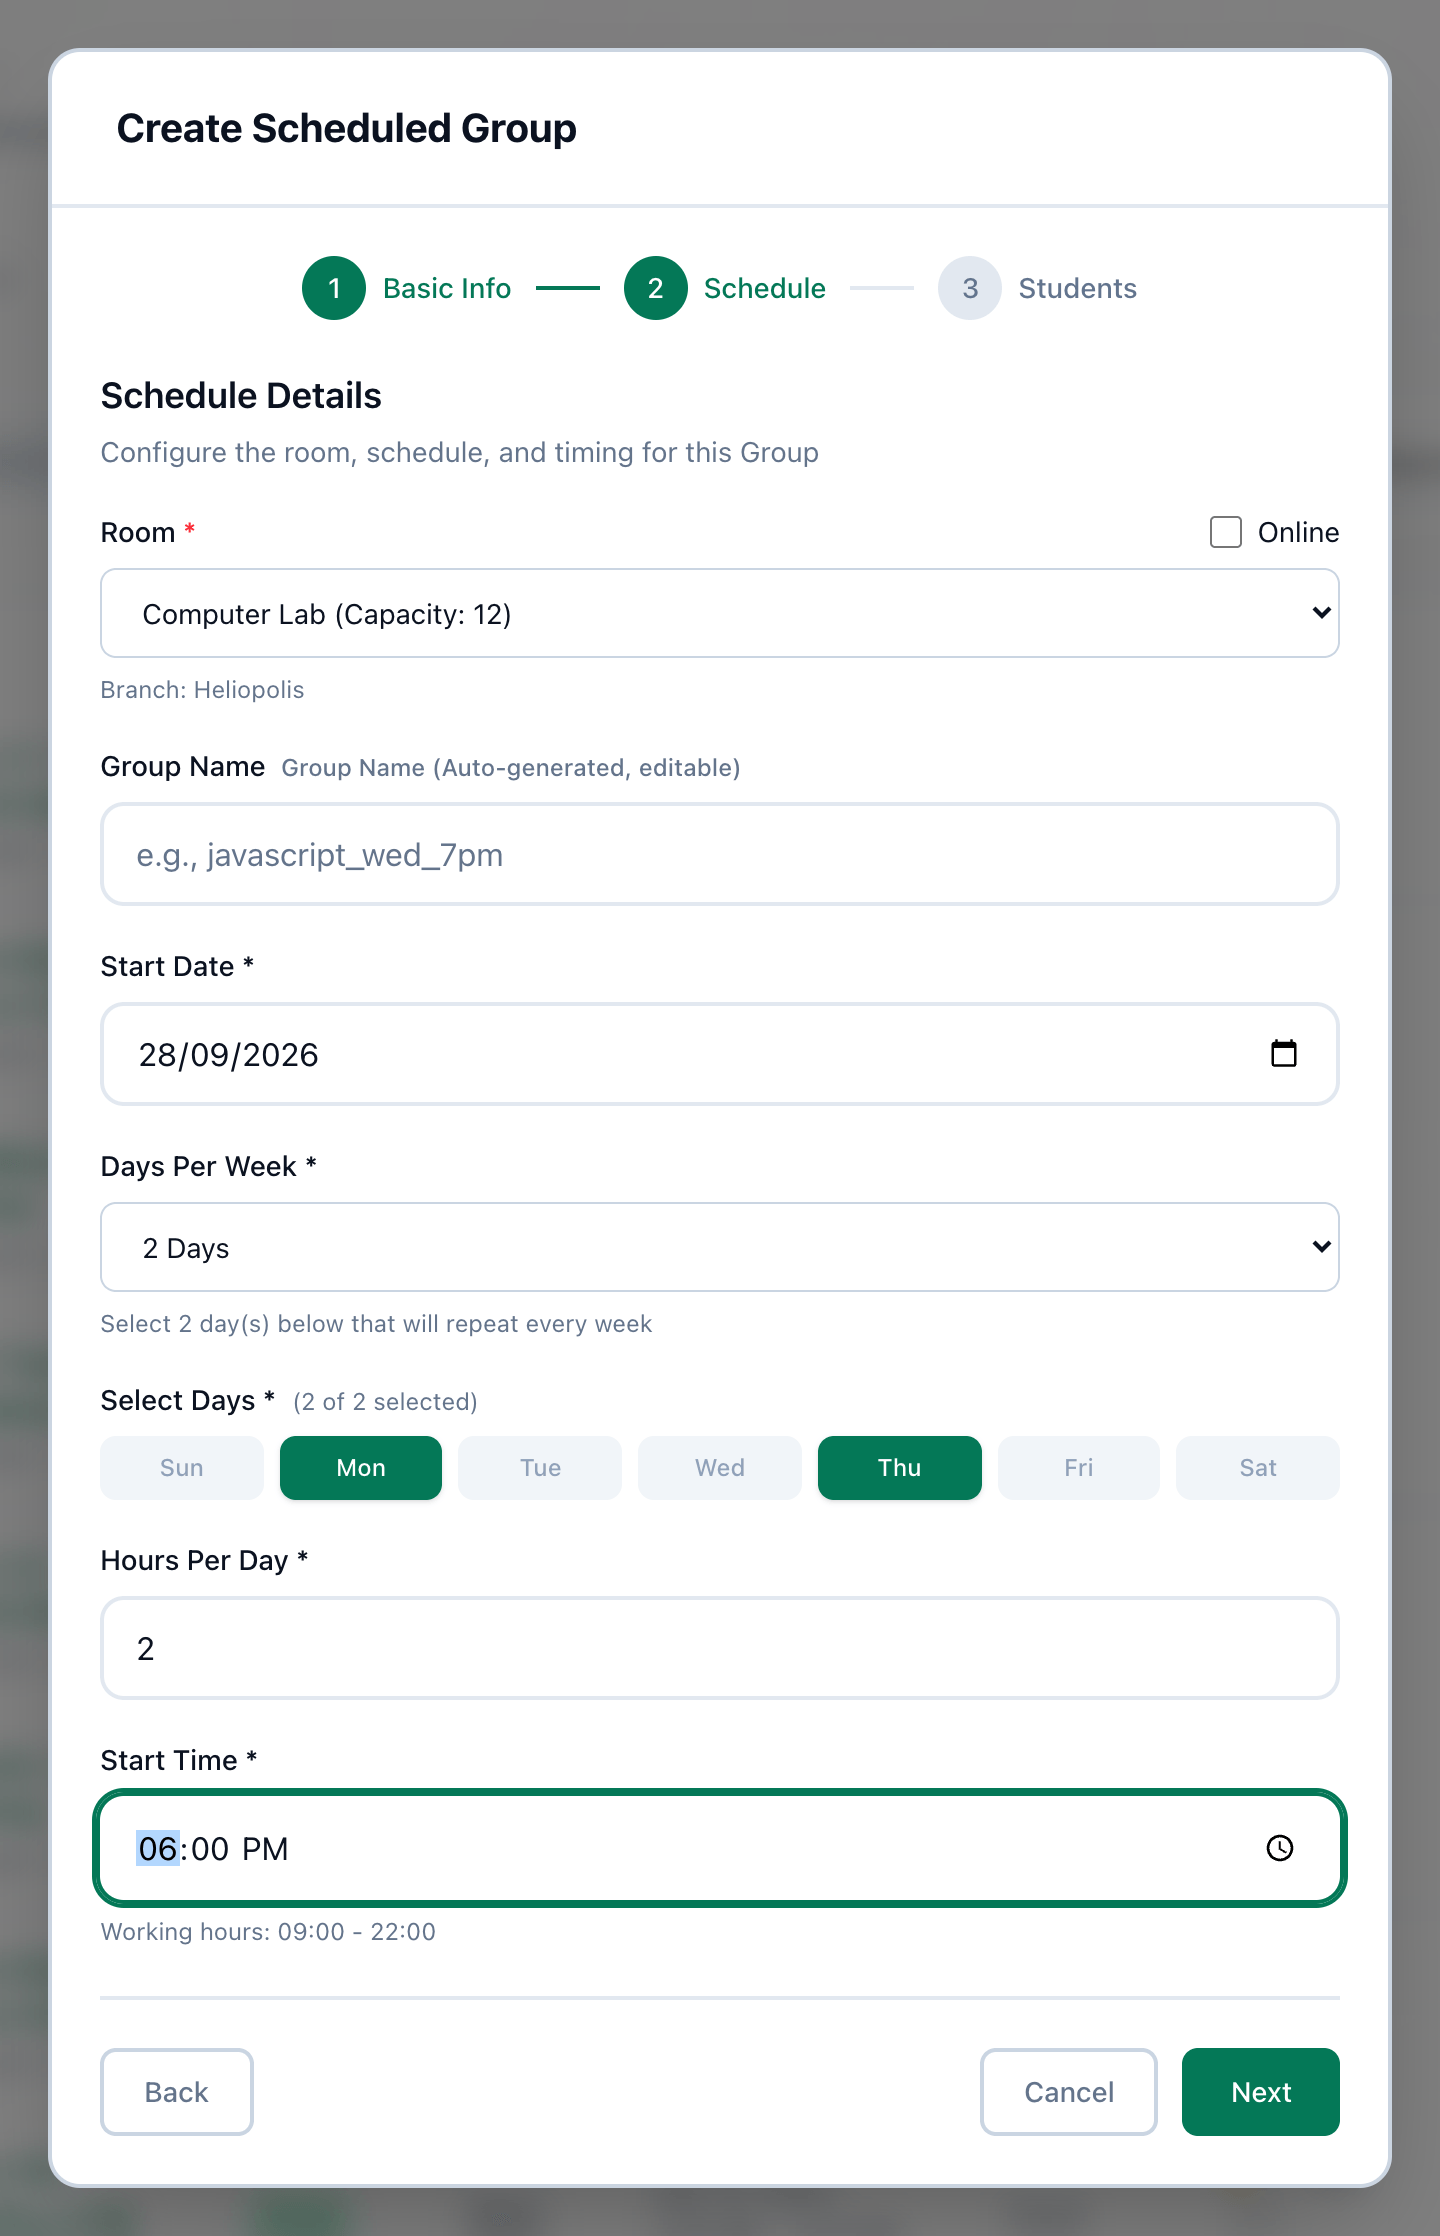
- Room
With more than one location, the student forms ask for a Home location. A student registered at the other branch can still join a group here: Not in your list? Find a student from another branch finds them by their exact phone number or email. See Creating a group and Adding students to a group.
4. The location switcher
Section titled “4. The location switcher”Once you work in more than one place, the location switcher appears at the top of the screen. All my locations shows everything; choosing a branch narrows what you see to it - Schedule shows only its rooms, and Fees and Reports only its money.
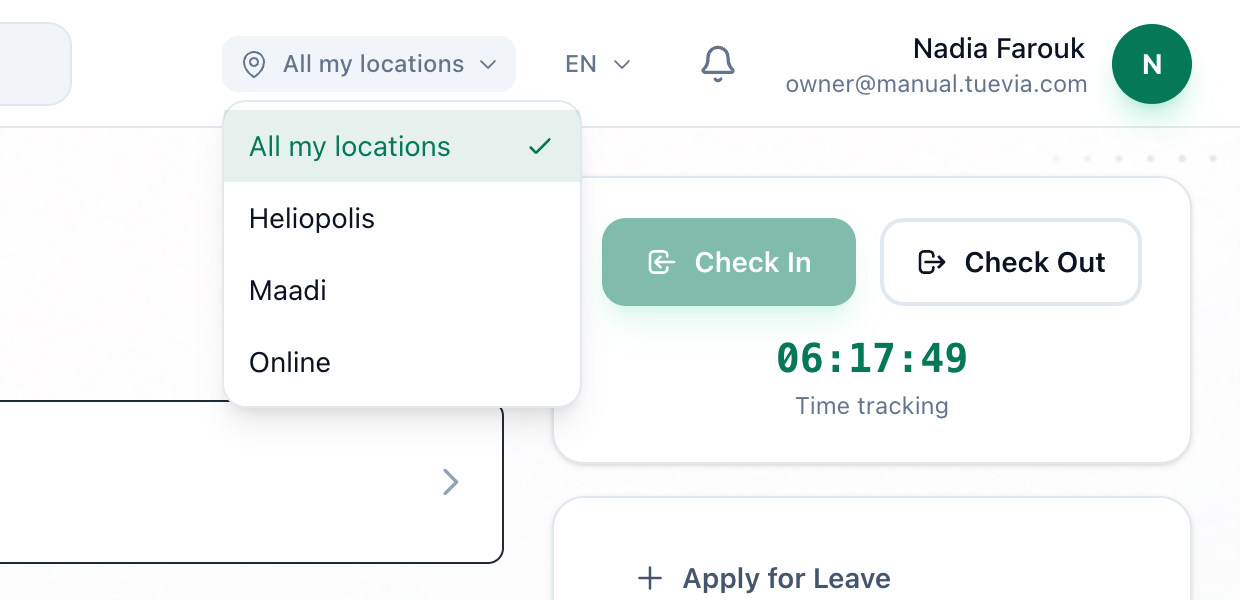
- Location
Staff who work in only one place do not see the switcher. See The Online location.
5. Reports: each branch’s money
Section titled “5. Reports: each branch’s money”On Finance → Reports, By location gives Money in, Money out, Net and Outstanding for each branch. Salaries have a row of their own, because they are paid to a person rather than in a branch. The table shows for people who work in every location.
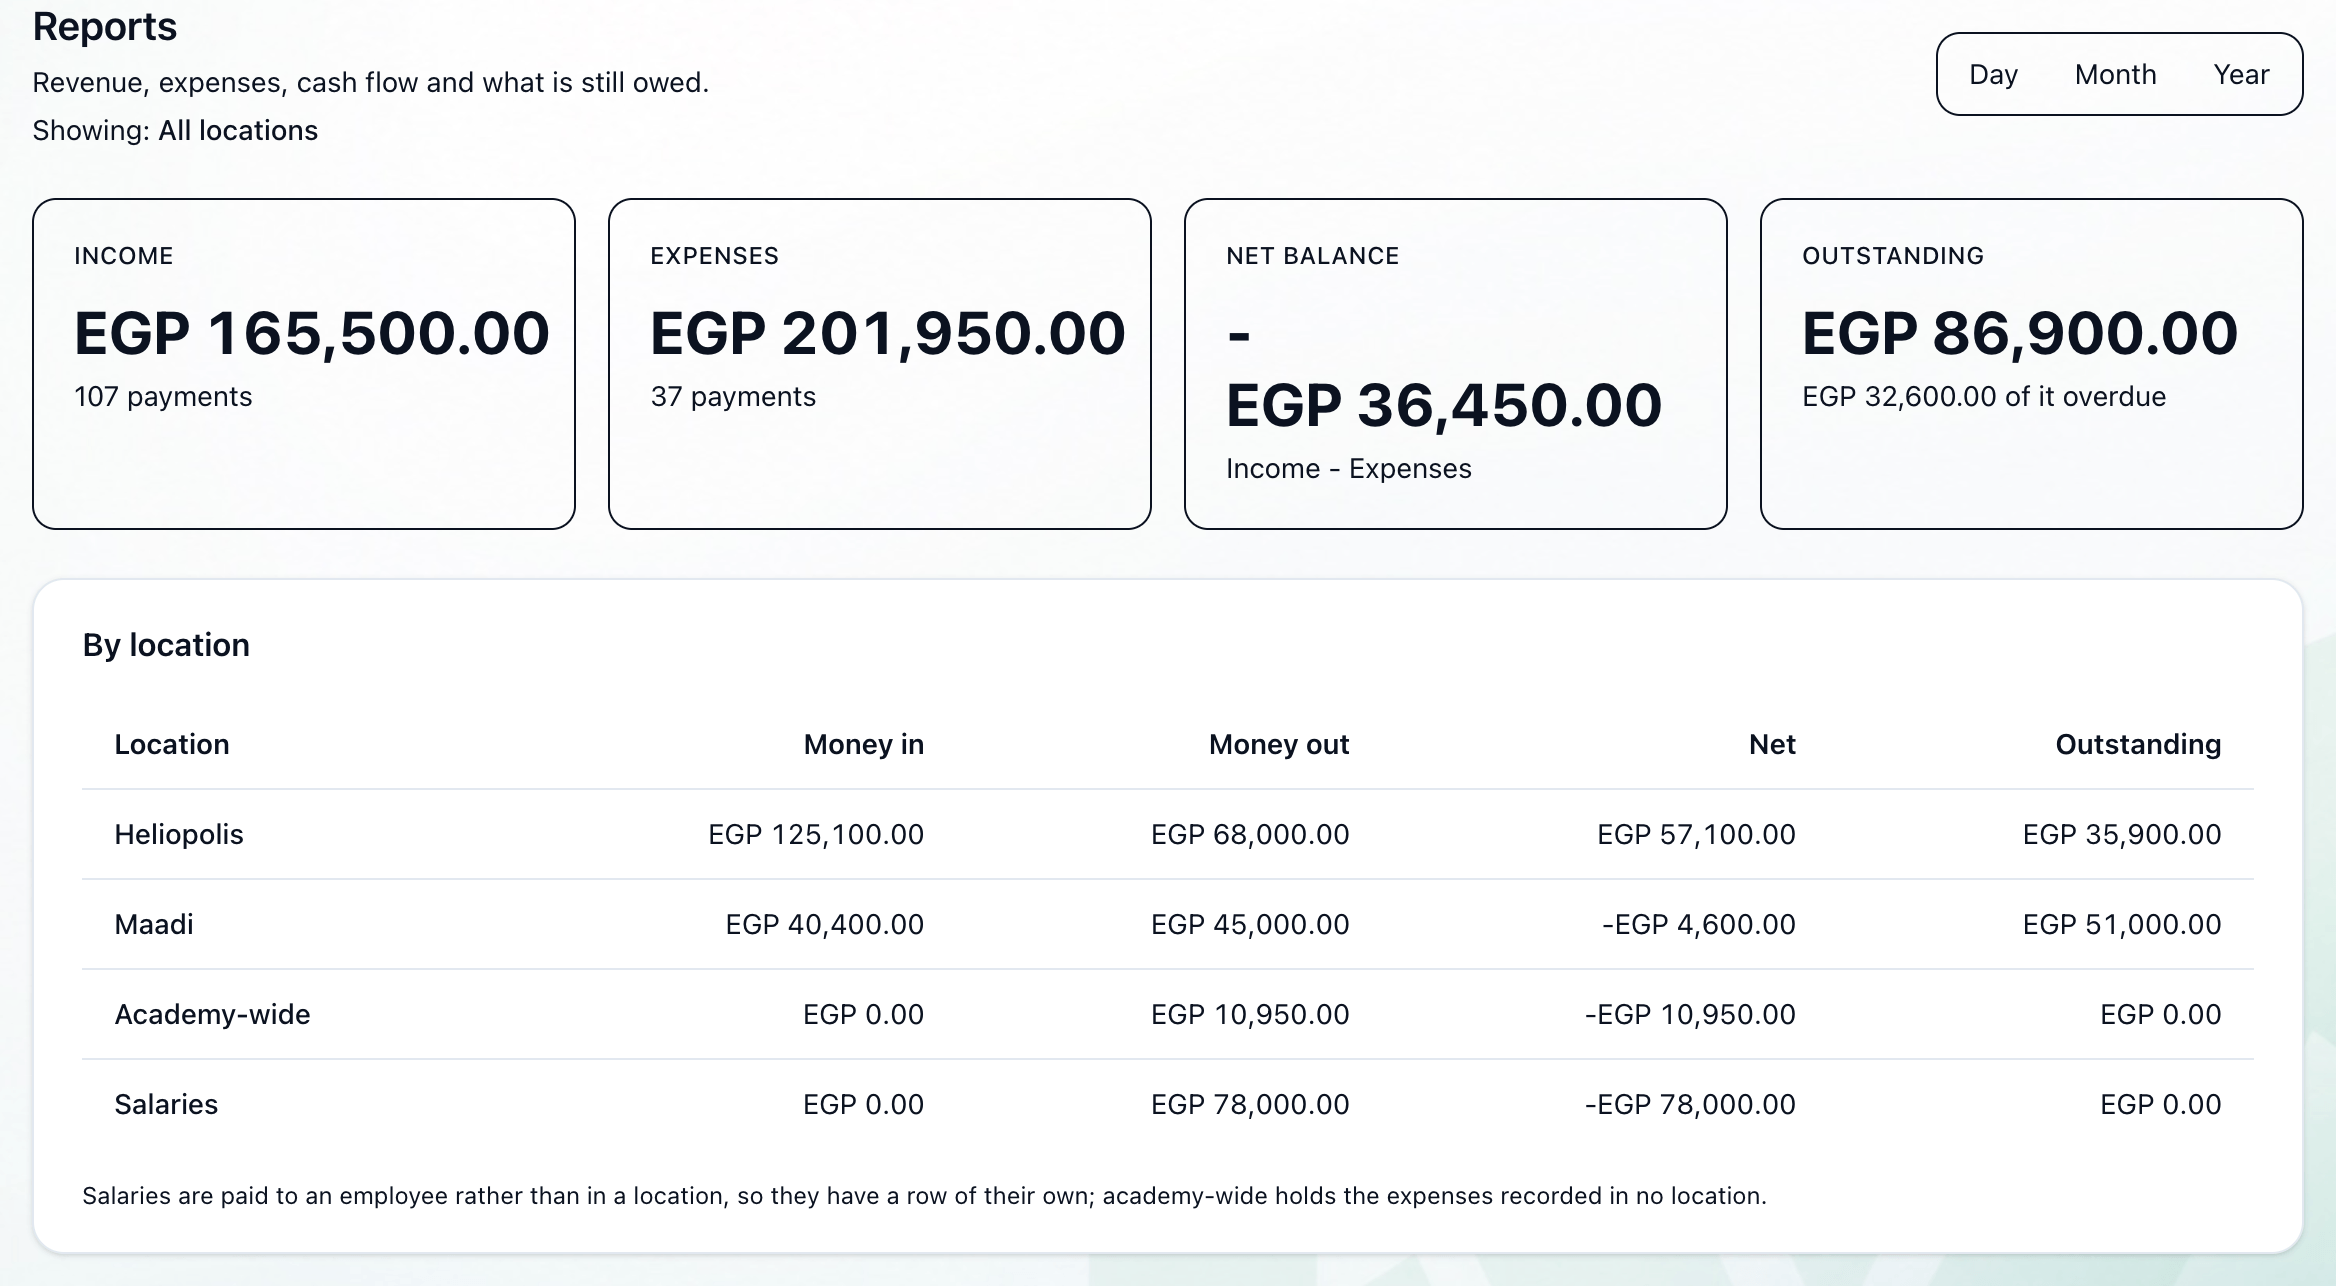
- By location
Choosing a branch in the location switcher narrows every report to it, and Showing: under the title names it. See Money in and out.