
Adding a salary
A salary says what an employee is paid and the working week it is for. The Salaries page lists one for each employee who has one. Owners, admins, and anyone whose role includes Finance or Salaries can open it; adding, changing and paying salaries needs permission to manage Salaries.
The salaries list
Section titled “The salaries list”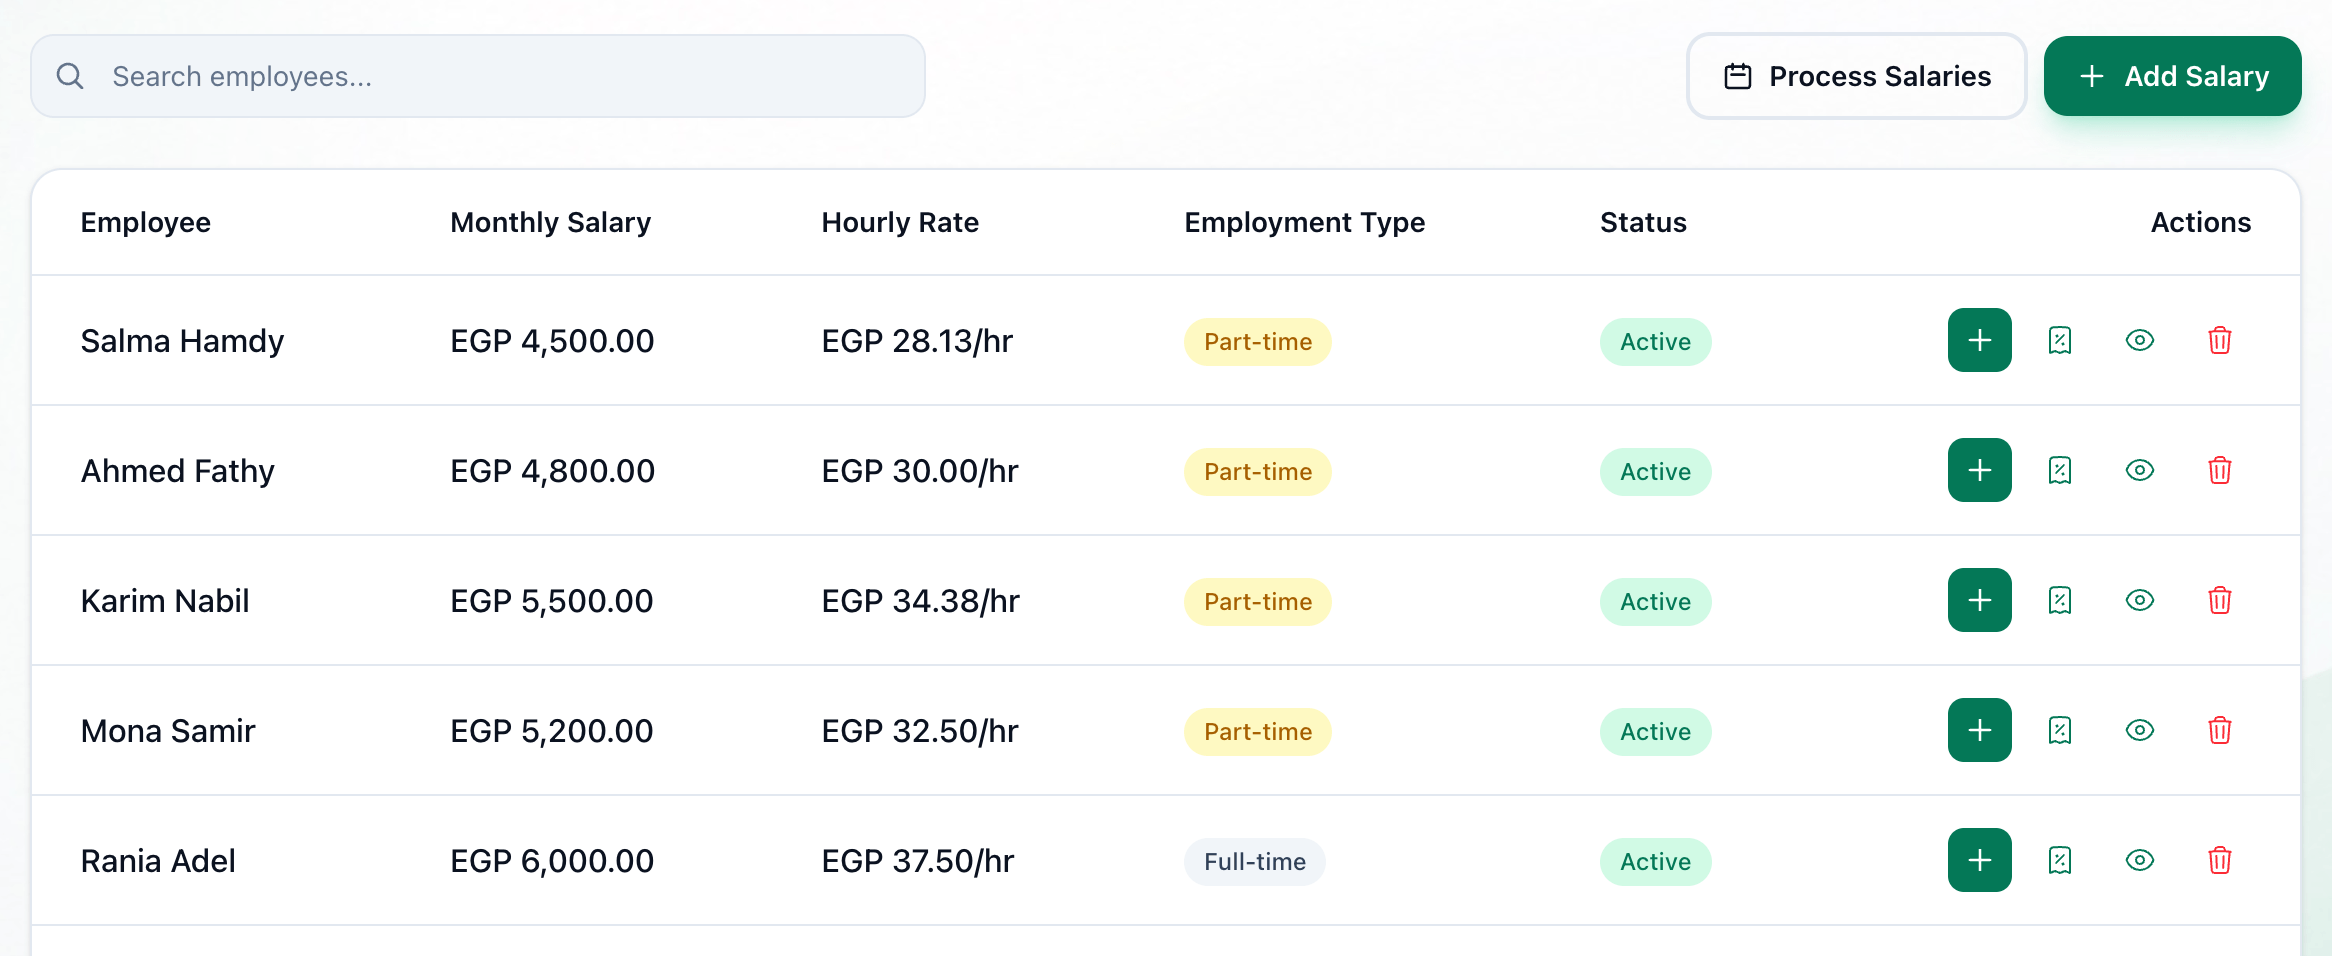
- Add Salary
- Deposit Salary
- Commission
- View Details
- Delete
Each row shows the employee’s Monthly Salary, Hourly Rate, Employment Type and Status. The hourly rate of a monthly salary is worked out from the expected hours a week, counting four weeks to a month.
- Add Salary — below.
- + pays this employee — see Paying one salary.
- Commission sets their share of what their groups collect — see Commission.
- The eye button shows the salary and what has been paid — below.
- The red bin deletes the salary — below.
Add a salary
Section titled “Add a salary”The form has two steps: the employee’s working week, then their pay.
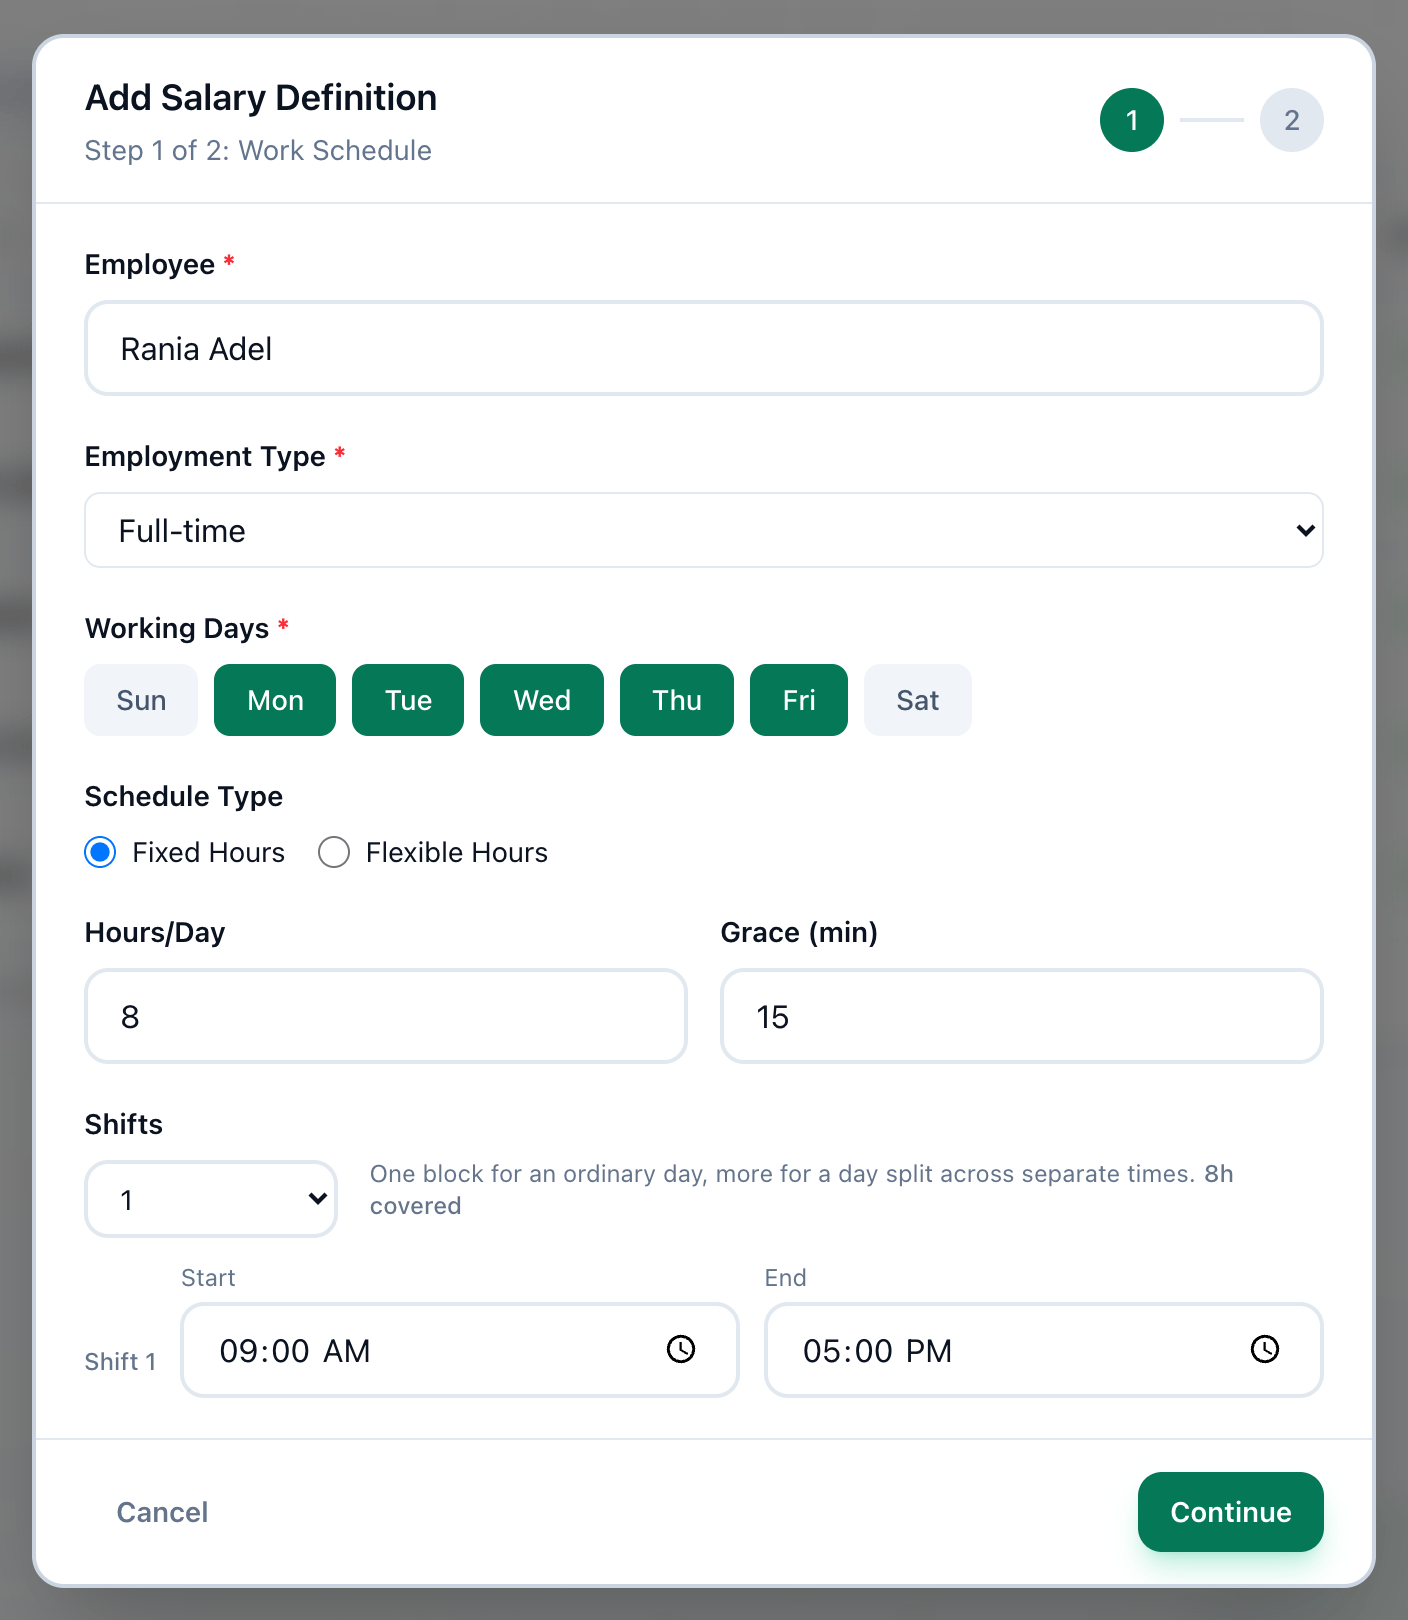
- Employee
- Employment Type
- Working Days
- Schedule Type
- Hours/Day and Grace
- Shift times
- Continue
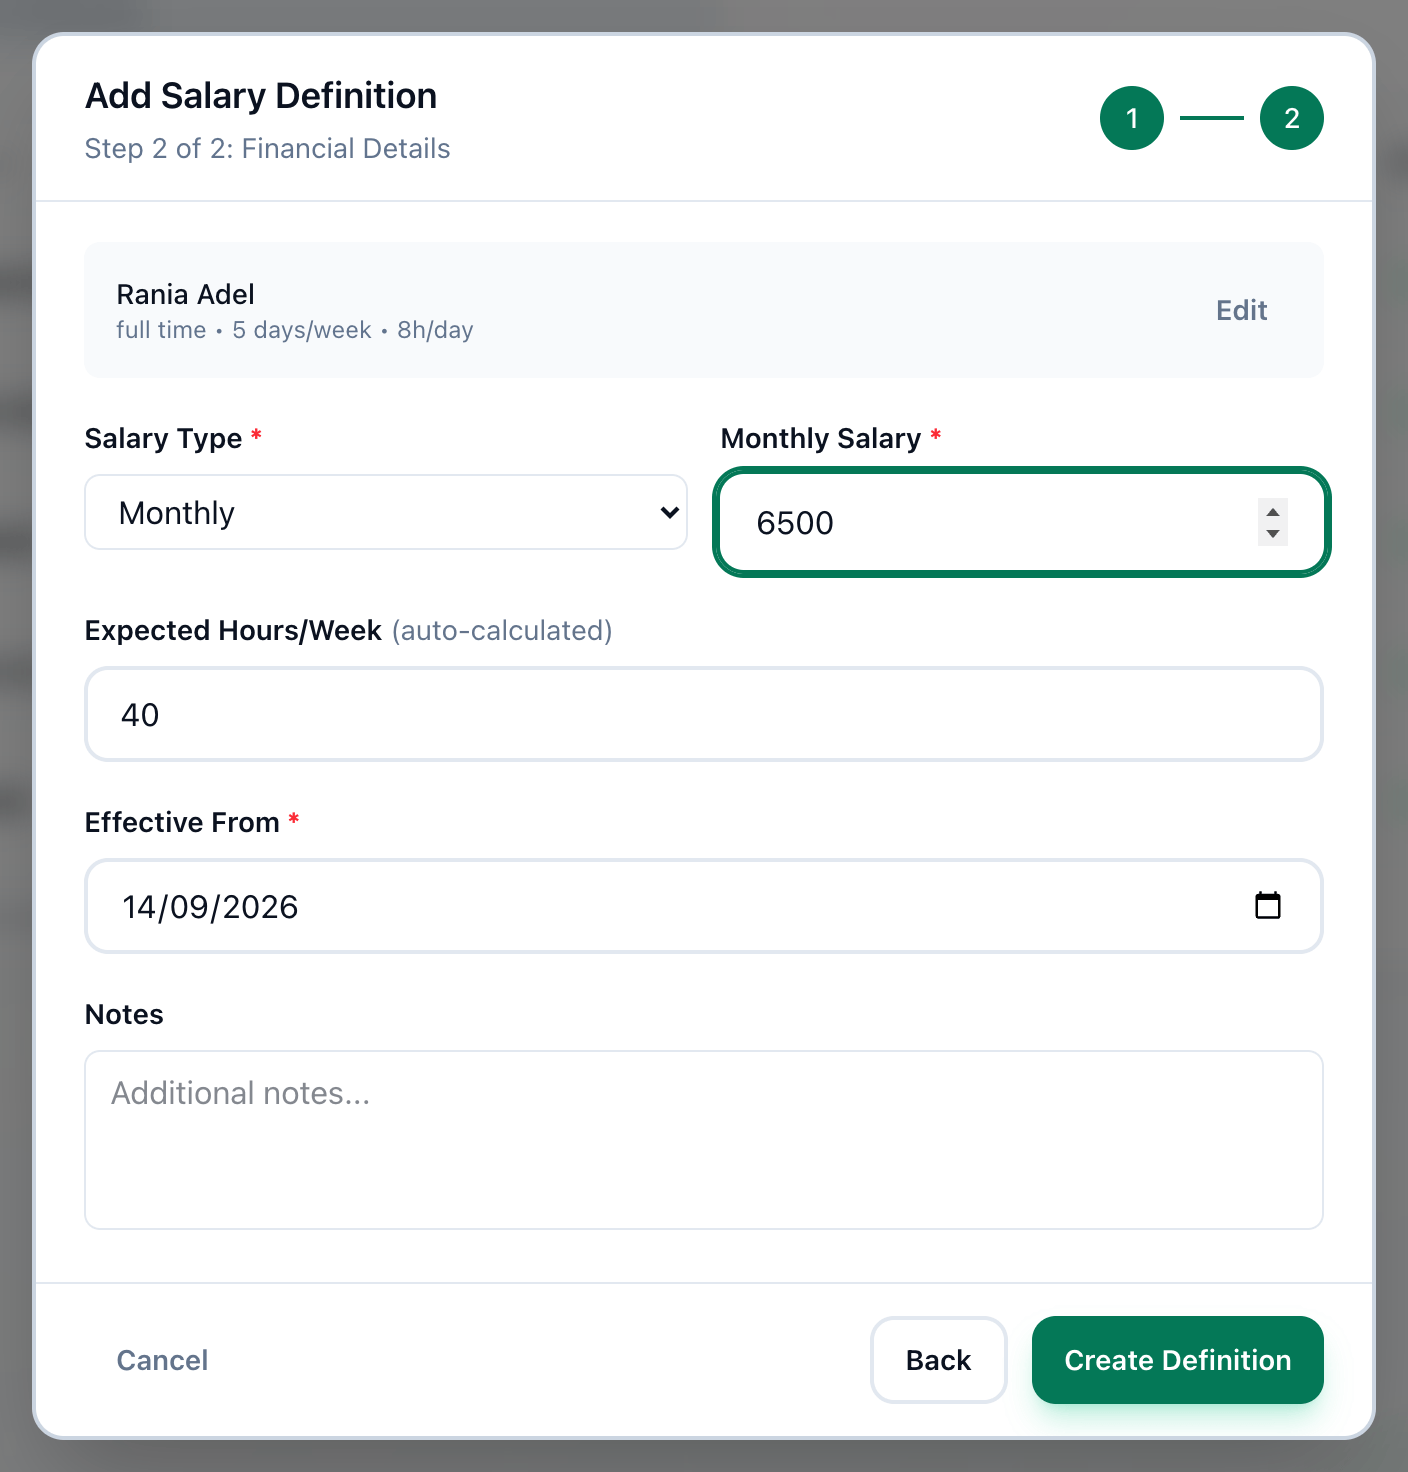
- Salary Type
- Monthly Salary
- Expected Hours/Week
- Effective From
- Create Definition
-
On the Salaries page, press Add Salary.
-
In Employee, type part of the employee’s name or email address and choose them from the list.
-
Choose Full-time, Part-time or Contract in Employment Type.
-
Under Working Days, press the days they work to switch them on or off. Monday to Friday are on to start with.
-
Choose Fixed Hours or Flexible Hours in Schedule Type.
-
Enter Hours/Day, and a grace period in minutes, from 0 to 60, in Grace (min).
-
For fixed hours, choose how many Shifts make up the day — one for an ordinary day, more for a day split across separate times — and set each shift’s Start and End.
-
Press Continue.
-
Choose Monthly or Hourly in Salary Type.
-
Enter the amount in Monthly Salary, or in Hourly Rate for an hourly salary.
-
Check Expected Hours/Week. Tuevia fills it in from the working days and the hours a day.
-
Choose the day the salary starts in Effective From. Add anything worth keeping in Notes.
-
Press Create Definition.
Saving sets the employee’s working week, which their attendance is measured against, and then their salary. If the employee already has a salary, the new one replaces it: the old one ends the day before the new one’s Effective From.
See what an employee has been paid
Section titled “See what an employee has been paid”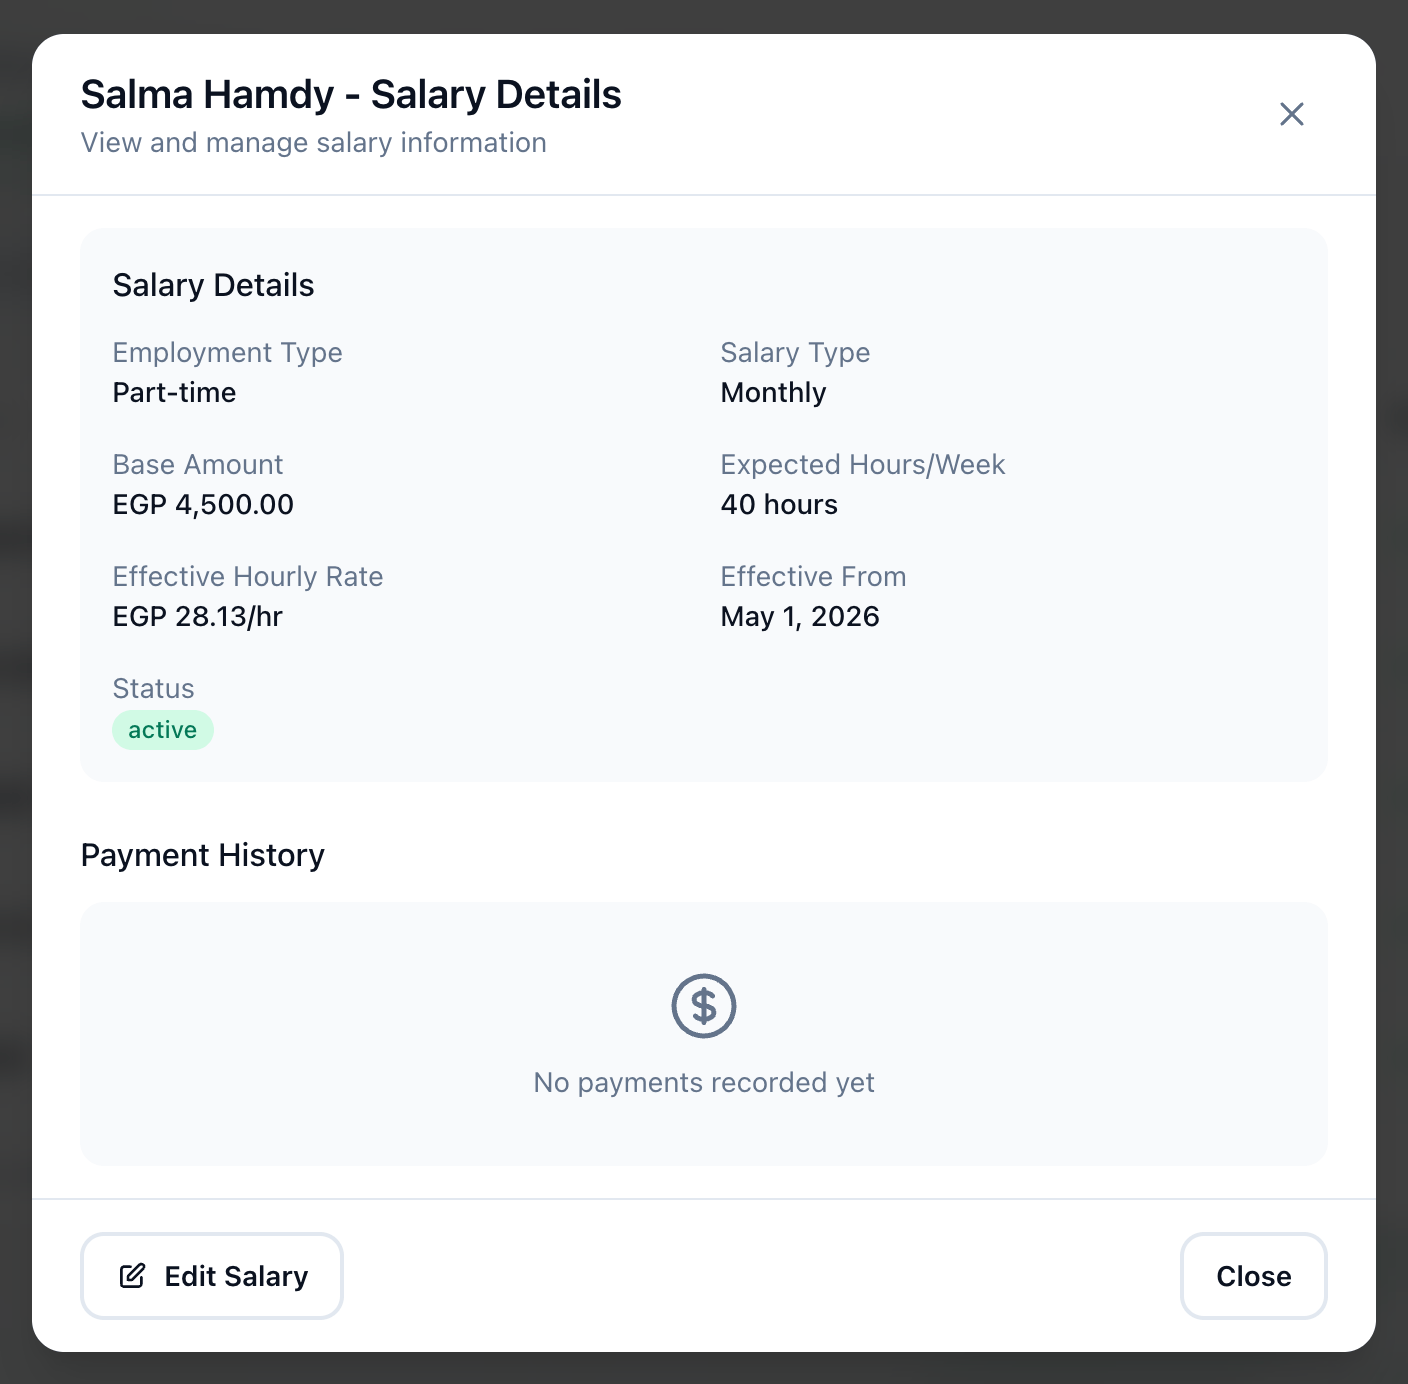
- Payment History
Press the eye button on the employee’s row. Salary Details shows the salary — its type, amount, expected hours, hourly rate, Effective From and status — and Payment History: every payment with its Date, Amount, Method, Reference, who confirmed it and Notes.
Delete a salary
Section titled “Delete a salary”Press the red bin on the employee’s row. Tuevia asks Are you sure you want to delete the salary definition for and the employee’s name. Confirm to delete it.
If something goes wrong
Section titled “If something goes wrong”-
Continue stays grey
Choose an employee from the list, switch on at least one working day, and check the shift times. -
salary amount must be greater than zero
Enter an amount above zero. -
Work schedule creation failed:
The employee’s working week could not be saved, so the salary was not either. The rest of the message says why. -
Failed to create salary definition
The salary was not saved. Try again.
What happens next
Section titled “What happens next”Pay one employee now — see Paying one salary — or everybody for a month — see Paying the month’s salaries. Employees themselves are added under Employees.