
Enrolling a new student and taking the first payment
Students → Groups → Fees → Receipt
A new student comes to the front desk, chooses a group and pays for their first month. This flow takes them from the door to a receipt. It is for owners, admins, and anyone whose role can manage both Students and Student Fees.
Before you start
Section titled “Before you start”The group they join has to exist and be running - see Creating a group.
1. Students: add the student
Section titled “1. Students: add the student”On Teaching → Students, press New enrolment. The window walks through Student, Group, Fee and Done, and saves each step as you leave it: the student is in Tuevia as soon as you press Create & continue.
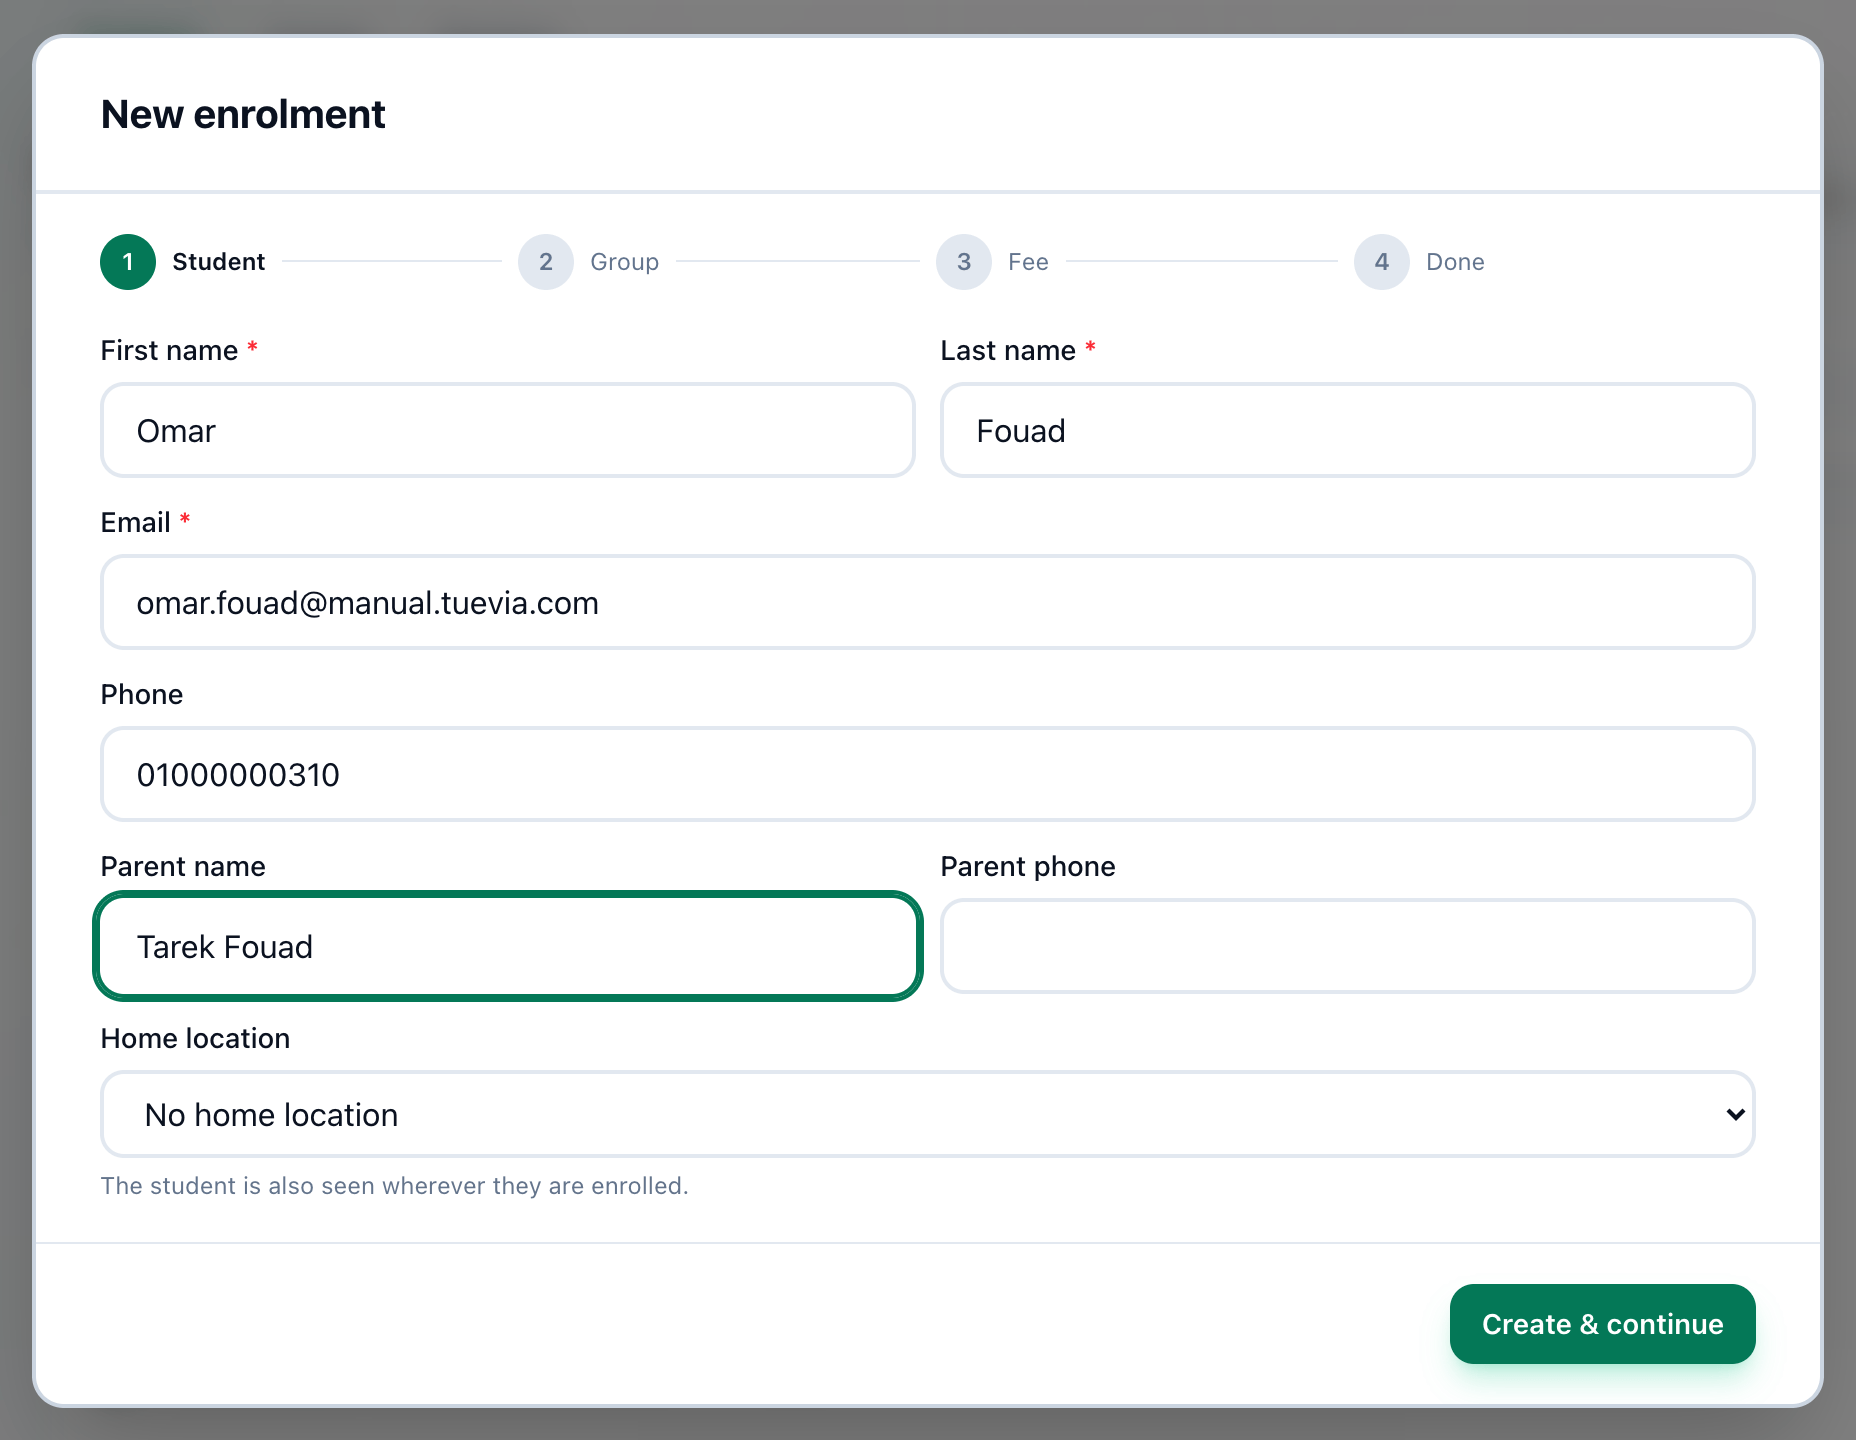
- The student
- Create & continue
Enter an email address you can reach them at: it is where the receipt is sent at stop 5. For a student who is already in Tuevia, press + Enroll in Group on their profile instead. See The New enrolment wizard and Enrolling a student in a group.
2. Groups: choose their group
Section titled “2. Groups: choose their group”At Group, choose the course, then one of its groups: each shows when it meets and the seats left, so you can agree the time with the student there and then. Press Enrol. The student becomes Active, and the group’s page on Teaching → Groups lists them under Students & Attendance, on the register their instructor takes.
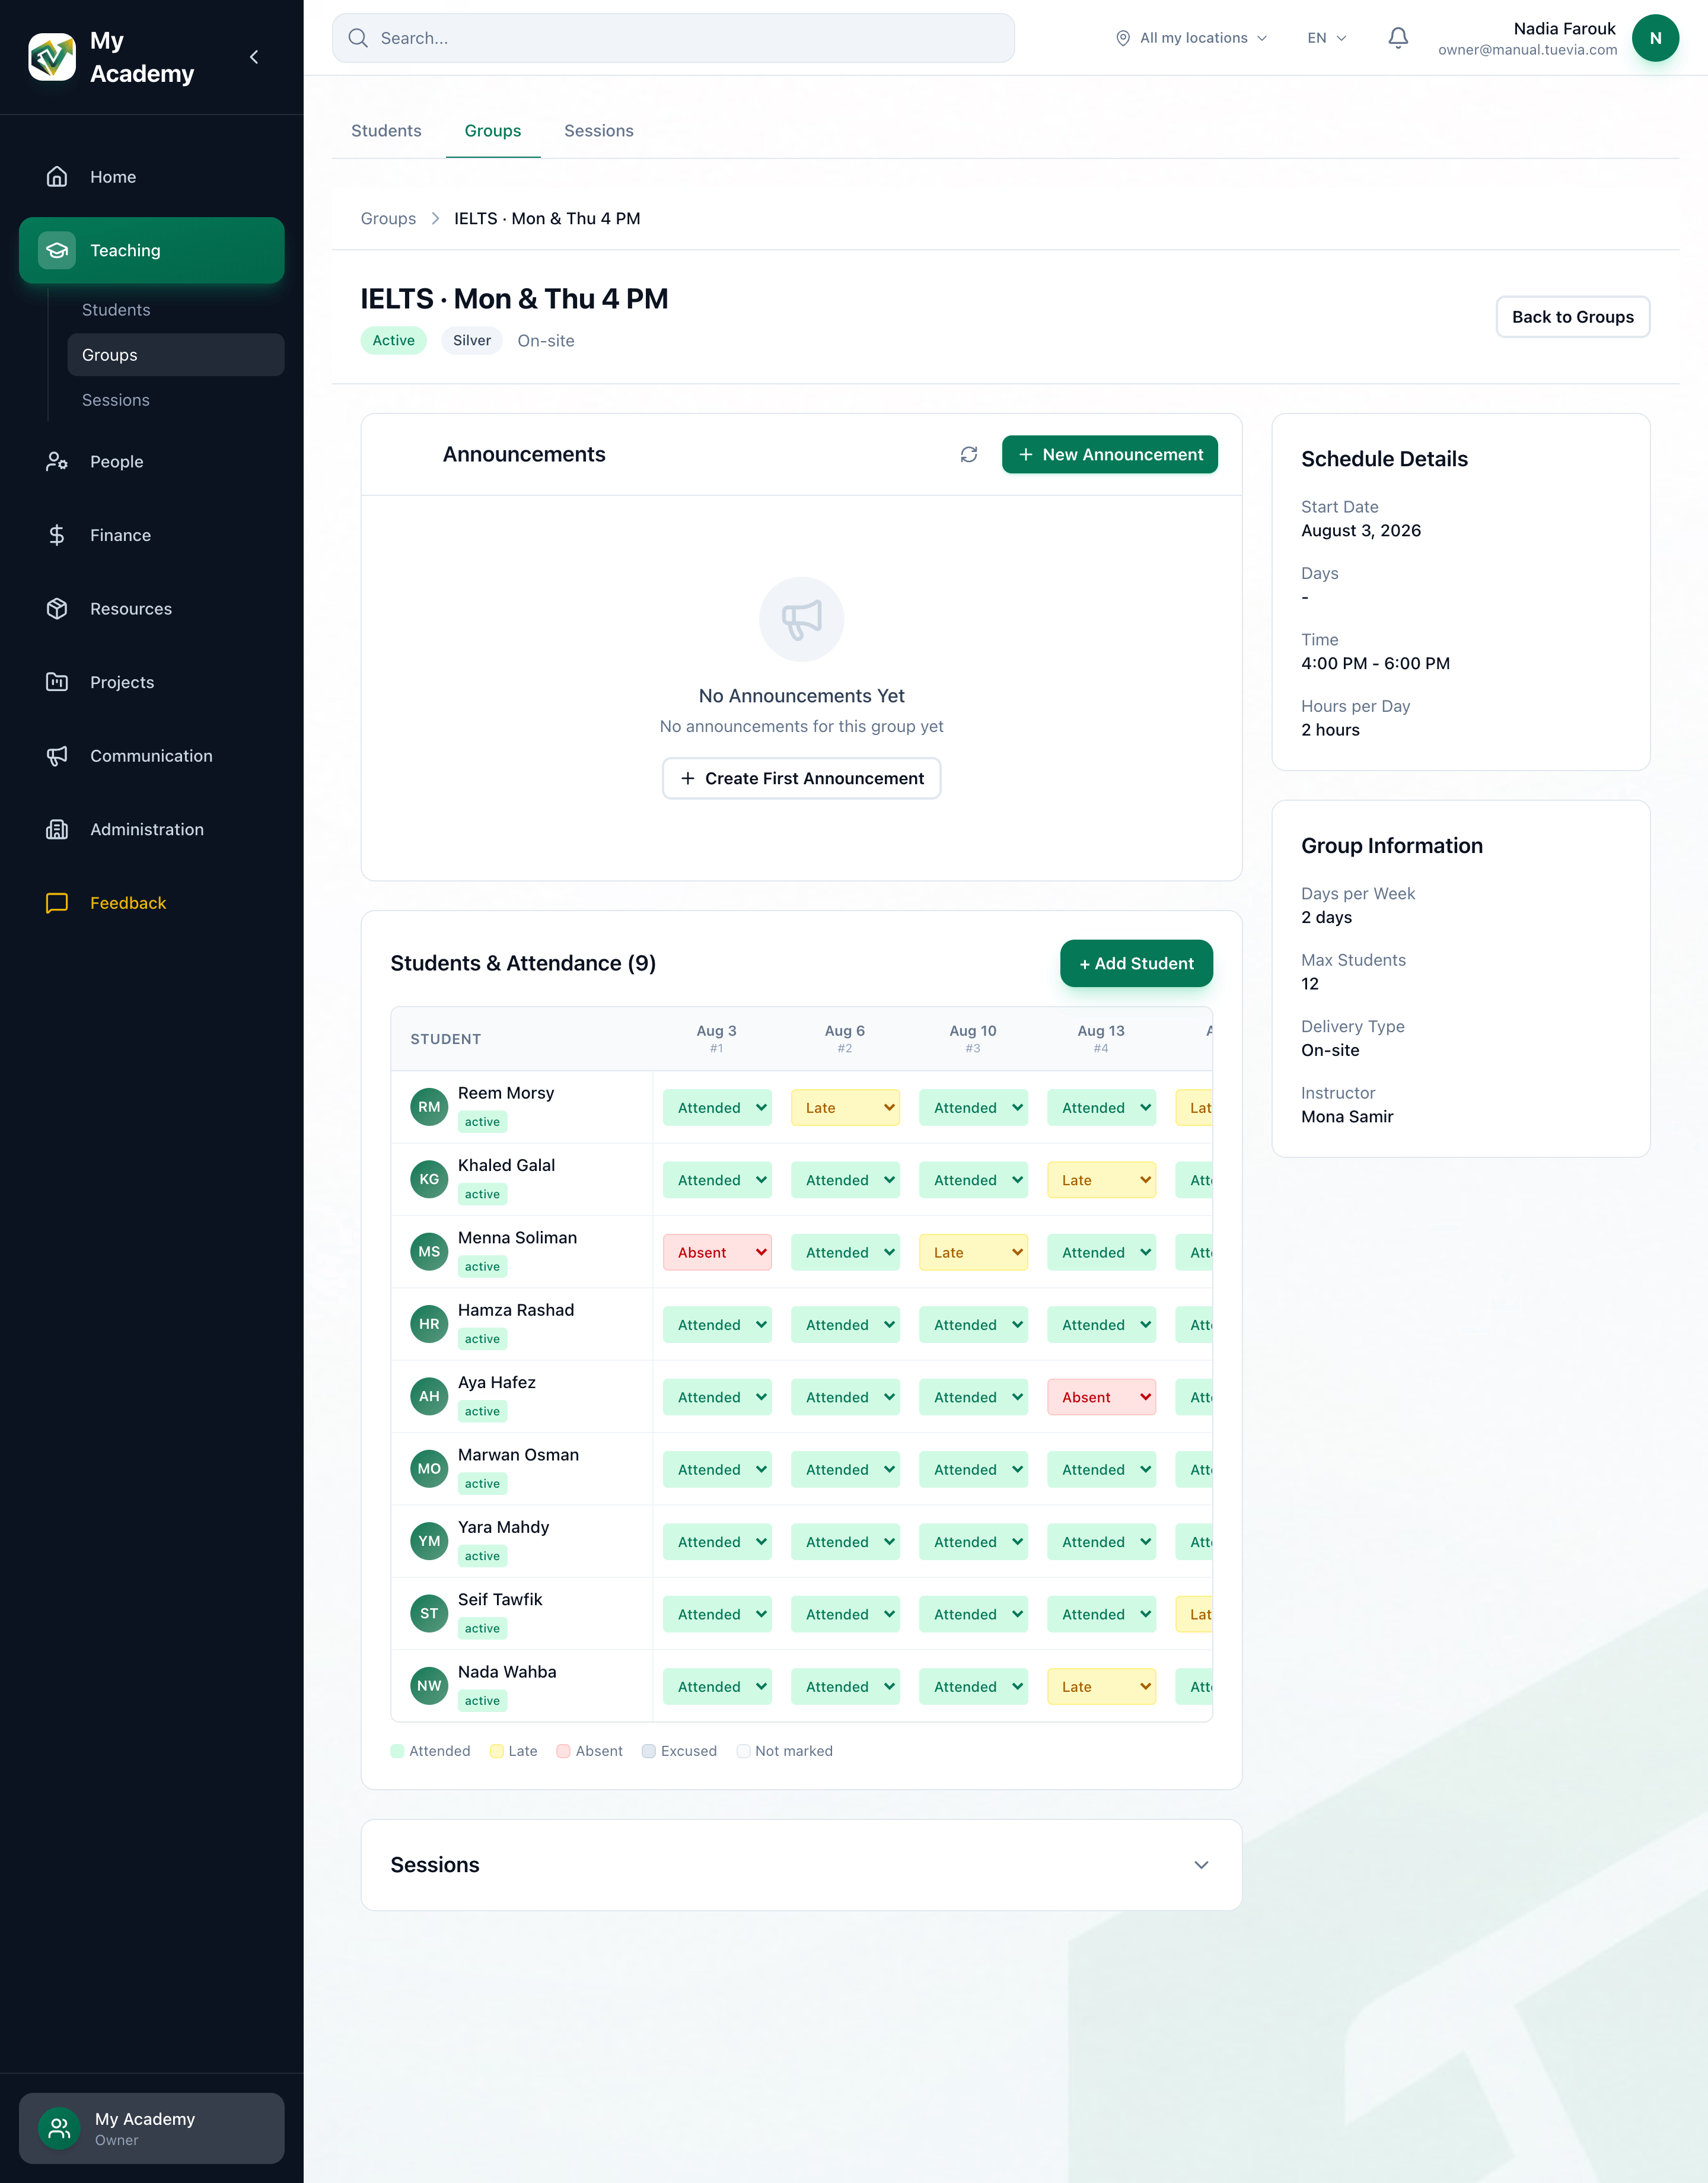
- Students & Attendance
See A group’s page.
3. Fees: set up what they pay
Section titled “3. Fees: set up what they pay”At Fee, enter the Total amount, choose Monthly or One-time and the Start date, and press Create fee. This is the student’s fee agreement: Tuevia works out the instalments from it, and the payment at the next stop is set against them.

- Total, Paid, Balance
- Add Payment
- Payment records
Leave Deposit now (optional) empty. The agreement does not keep a deposit; money paid today is recorded as a payment at the next stop, where it counts and gets a receipt. If you pressed Skip fee, press New Student Pay on Finance → Fees later. See Setting up a student’s fees.
4. Fees: record the payment
Section titled “4. Fees: record the payment”On Finance → Fees, type the student’s name in Search agreements… and press + on their agreement. Enter the Amount, choose the Payment Method, and press Add Payment. The payment pays off the oldest unpaid instalment first.
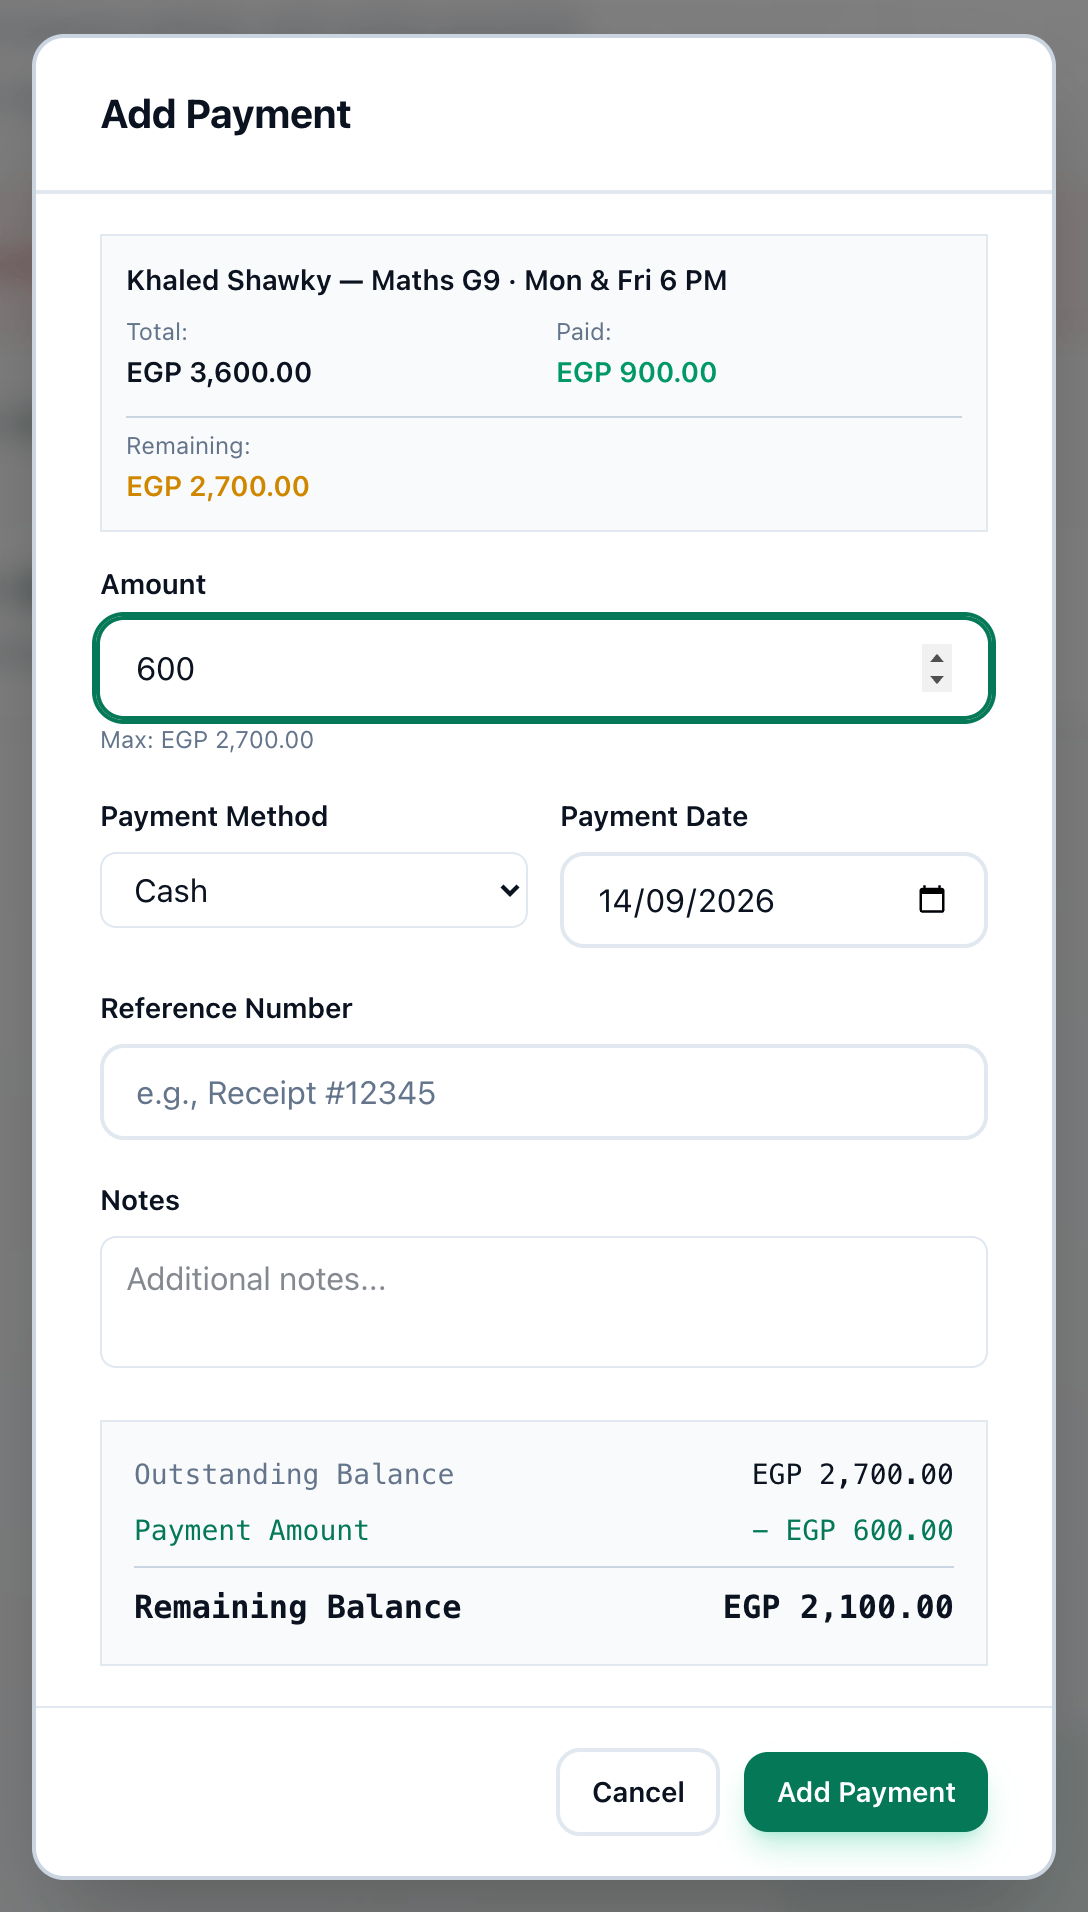
- Amount
- Payment Method
- Add Payment
Add Payment under Payments on the student’s profile opens the same window. See Recording a payment.
5. The receipt
Section titled “5. The receipt”Payment recorded stays open after you save. Press Print receipt to hand them a printed receipt, or Send receipt to email it to the address from stop 1, then press Done.
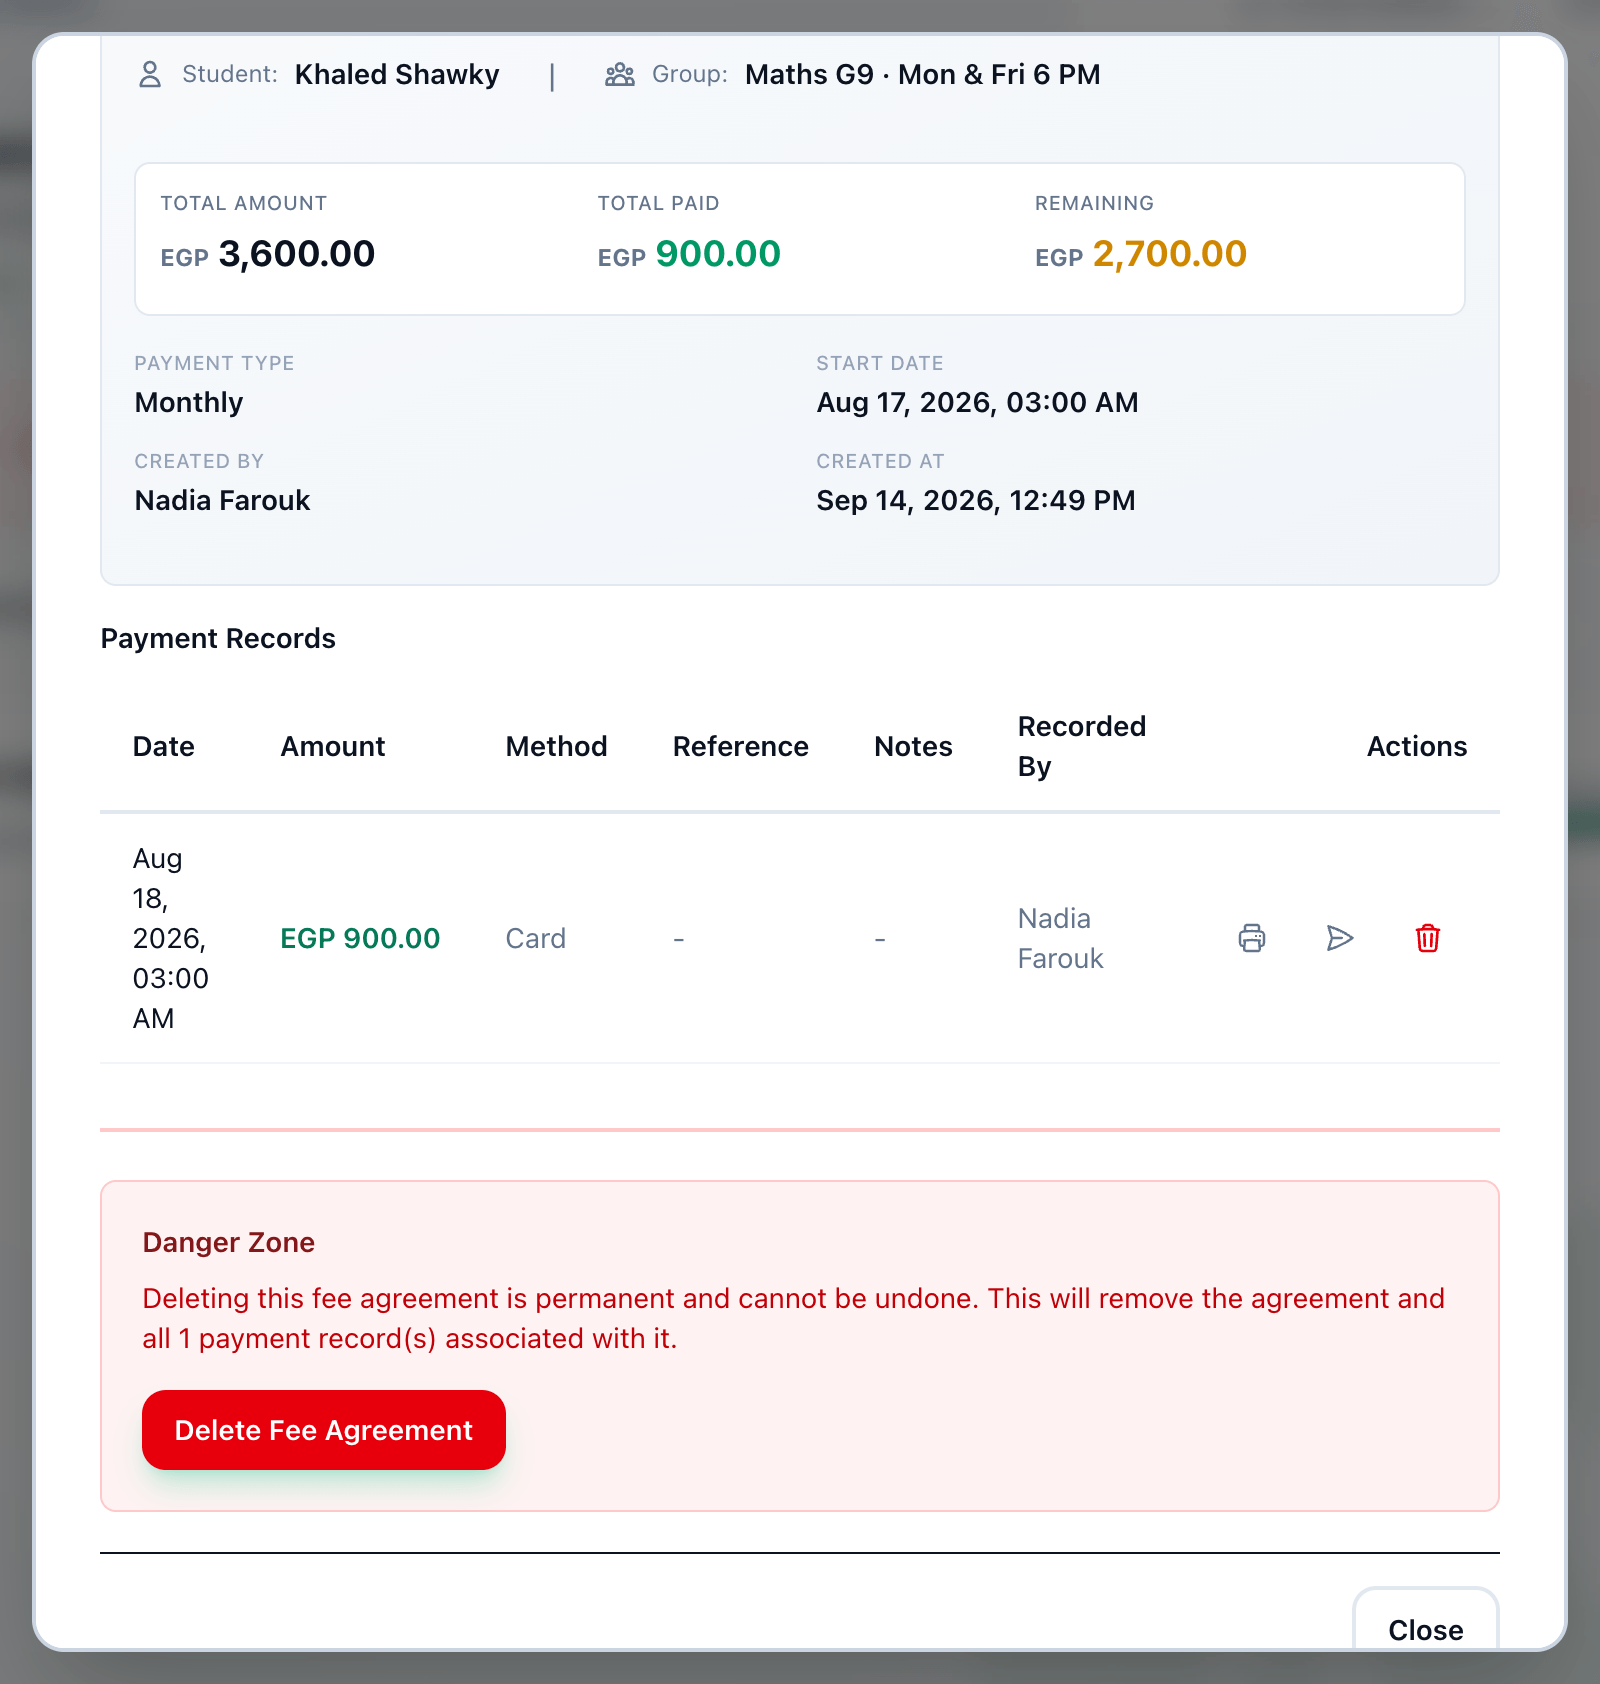
- Print receipt
- Send receipt
To print or send it again later, open Payment Records with the eye button on the agreement. See Payment records, receipts and corrections.
Afterwards
Section titled “Afterwards”- The student’s profile shows their group, their attendance as it is taken, and the fee under Payments - see The student profile.
- Owners and admins who work in the group’s branch receive New enrollment; staff there with a finance or student fees permission receive Payment recorded - see What you are notified about.
- The payment is in Income on Reports.
- Next month’s instalment is recorded the same way, from stop 4. An instalment left unpaid past its date marks the agreement Overdue - see The fees list.